
Are your energy bills climbing higher every season? Does your backyard shed feel like a freezer in winter and a sauna in summer? You’re not alone. Many homeowners with metal sheds struggle with unpredictable temperatures, noise from rainstorms, and even unsightly condensation dripping from the ceiling.
According to the U.S. Department of Energy, metal roofs lose heat twice as fast as insulated structures. That can mean wasted money and lost comfort. But the good news? Insulating a metal shed roof is a straightforward DIY project—even for beginners—with the right materials and a little guidance.
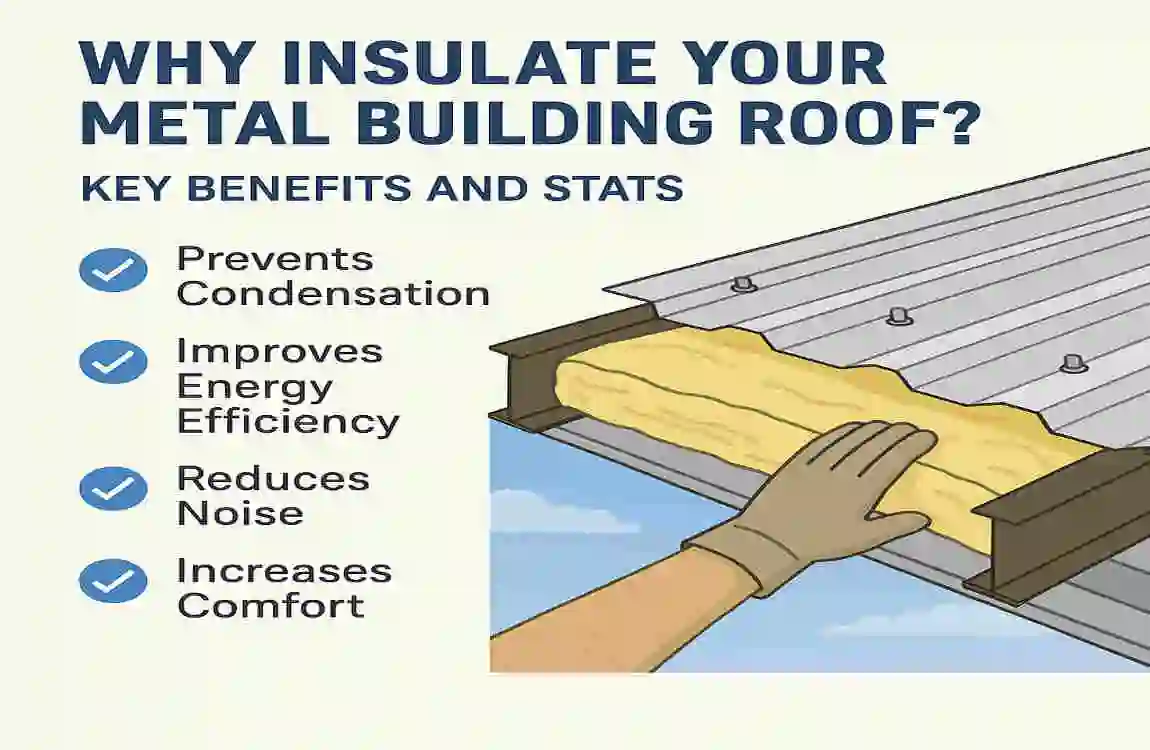
Why Insulate Your Metal Building Roof? Key Benefits and Stats
Before we jump into the “how,” let’s talk about the “why.” Insulating your metal building roof brings a range of benefits that go far beyond just temperature control.
Energy Efficiency and Cost Savings
Metal roofs are excellent at conducting heat—meaning in summer, your shed can turn into an oven, and in winter, it leaks warmth like a sieve. Proper insulation acts as a barrier, slowing down heat transfer and stabilizing indoor temperatures.
According to Energy Star, well-insulated metal roofs can cut your heating and cooling costs by up to 25%. That’s a big difference, especially if you use your shed as a workshop, office, or hobby space.
Energy-saving tips for insulating metal shed roofs:
- Use high R-value insulation (more on that soon)
- Seal all gaps and seams
- Add a radiant barrier in sunny climates
Prevents Condensation and Moisture Damage
Ever notice beads of water forming inside your shed on cold mornings? That’s condensation—a common problem with metal roofs. Without insulation and a proper vapor barrier, warm indoor air comes into contact with the cold metal, turning to water. Over time, this leads to rust, mold, and even costly repairs.
Noise Reduction and Comfort
Rain pounding on a bare metal roof can hit 80 decibels or more—that’s as loud as city traffic! Insulation acts as a sound barrier, cutting noise levels by 50% or more. Your shed becomes a quieter, more pleasant place to work or relax.
Insulation Benefits Comparison
Benefit Without Insulation With Insulation Savings Estimate
Energy Costs High loss 20-30% reduction $200-500/year
Condensation Risk High Low Prevents $1k+ repairs
Noise Level Loud (80dB rain) Quiet (50dB) Improved livability
Understanding Metal Building Roof Insulation Basics
Let’s clear up some confusion about insulation types, what “R-value” means, and what you’ll need to get started.
Types of Insulation for Metal Roofs
You have several options when choosing the best insulation for a metal building roof. Each has its strengths—and fits different budgets and climates.
- Spray Foam (Closed-Cell):
- Pros: Highest R-value (R-6 per inch), acts as a vapor barrier, fills gaps
- Cons: Costly, requires equipment/safety gear
- Rigid Foam Boards (Polyiso, XPS, EPS):
- Pros: Affordable, easy to cut and install, good R-value (R-5/inch)
- Cons: Joints must be sealed, may need a vapor barrier
- Fiberglass Batts with Vapor Barrier:
- Pros: Inexpensive, widely available, easy for DIY
- Cons: Must stay dry, needs careful fitting
- Reflective Bubble Foil (Radiant Barrier):
- Pros: Blocks radiant heat (great for hot areas), lightweight, simple install
- Cons: Low R-value alone, best as a supplement
Insulation Pros & Cons Table
TypeR-Value/Inch DIY-Friendly Moisture Resistant Cost Best For
Spray Foam 6 Moderate Yes $$$ Maximum efficiency
Rigid Foam Board 5 Yes Yes (if sealed) $$ Most sheds
Fiberglass Batt 3.5 Yes No $ Dry climates
Bubble Foil 1 (reflective) Yes Yes $ Hot, sunny regions
R-Value Explained: What You Need for Your Shed
R-value measures insulation’s ability to resist heat flow—the higher, the better. For most home sheds, aim for R-19 to R-30 in your roof.
Climate Zone R-Value Chart
Climate ZoneRecommended R-Value
Warm (South) R-13 to R-19
Moderate R-19 to R-25
Cold (North) R-25 to R-30
Formula: ( R_{\text{total}} = \sum R_i ) (add up layers for total R-value)
Tools and Materials Checklist
Before you begin, gather these essentials:
- Safety gear: Gloves, goggles, mask, coveralls
- Tape measure and utility knife
- Rigid foam boards or chosen insulation
- Adhesive or insulation tape
- 6-mil poly vapor barrier
- Caulk or spray foam sealant
- Ladder, hammer, drill
- Respirator (for spray foam)
- Estimated Cost: $500 – $1,500 for a 500 sq ft shed
Preparation: Is Your Metal Roof Ready for Insulation?
Assess Your Shed’s Roof Structure
First, identify your roof style:
- Purlins: Horizontal beams under roof panels—ideal for attaching foam boards.
- Standing Seam: Raised seams connect metal panels—measure spacing for batts/boards.
Measure the roof’s pitch and square footage to estimate how much insulation you’ll need. Don’t forget to check for tricky angles or obstructions.
Safety First: Essential Precautions
Working on a roof can be dangerous. Here’s how to stay safe:
- Use a sturdy ladder and a safety harness.
- Check the weather—avoid rainy or windy days.
- Follow local building codes and permit requirements.
- Wear gloves, goggles, and a mask—especially when handling fiberglass or spray foam.
Common Mistakes to Avoid Before Starting
Many DIYers make these avoidable errors:
- Skipping cleaning: Dirt and rust prevent insulation from sticking.
- Ignoring ventilation: Poor airflow causes trapped moisture.
- Not sealing air leaks: Gaps around vents or edges let heat and moisture escape.
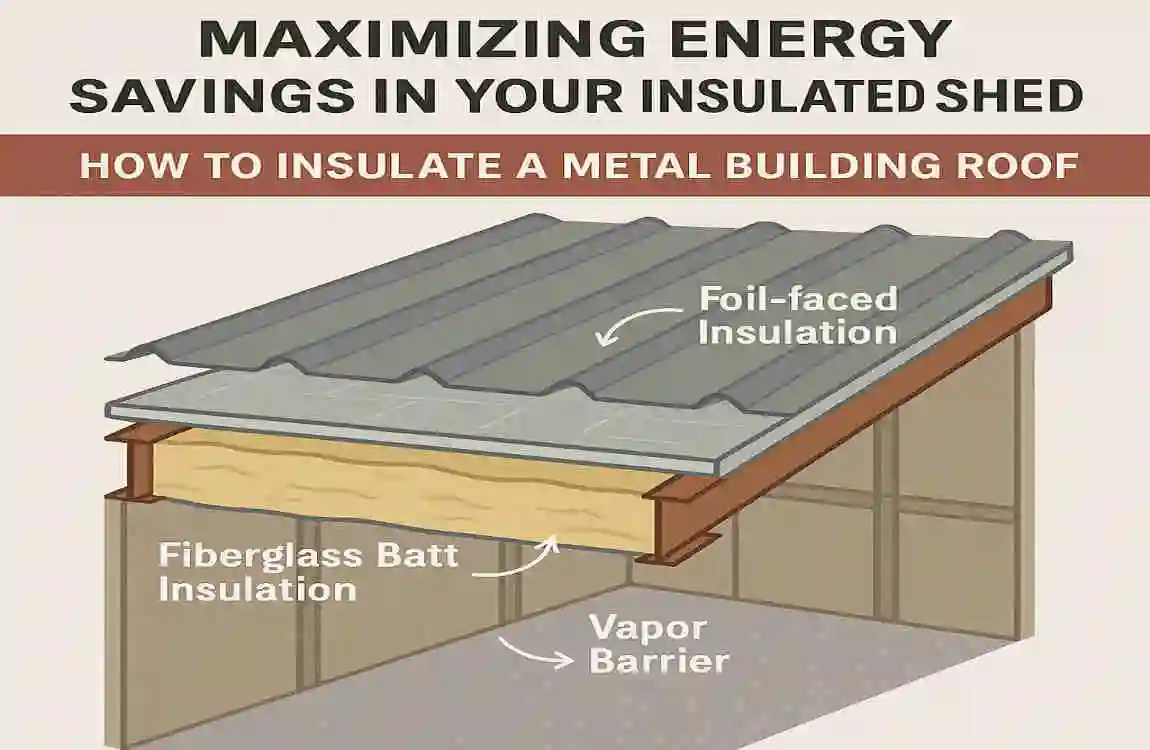
Step-by-Step DIY Guide: How to Insulate a Metal Building Roof
Here’s where the magic happens! Follow these steps to insulate your metal building roof like a pro.
Step 1: Clean and Prep the Roof Interior
Start with a clean slate. Remove all stored items and sweep away dust, cobwebs, and debris. Check for and repair any leaks or rust spots—these can undermine your insulation and lead to moisture problems later. If you spot mold, treat it with a bleach solution before proceeding.
install Ventilation and Vapor Barrier
Good airflow is key to preventing future condensation. If your shed doesn’t already have them, install ridge vents and soffit vents for cross-ventilation.
Next, staple or tape 6-mil poly sheeting (vapor barrier) across the roof framing. Overlap seams by 6 inches and tape them securely. The vapor barrier faces the inside of the shed.
Choose and Cut Your Insulation
Select your preferred insulation type:
- Spray Foam: Rent a kit or hire a pro for large jobs. Apply an even layer (~2-3 inches) directly to the underside of the metal roof between framing members.
- Rigid Foam Boards: Measure the spaces between purlins or rafters—cut boards to fit snugly using a utility knife.
Lay out your pieces before attaching to ensure complete coverage. If using fiberglass batts, always keep the vapor barrier facing down (warm side in winter climates).
Secure Insulation to Purlins/Rafters
- Foam Boards/Batts: Affix boards to framing with construction adhesive and/or metal straps. Stagger seams to reduce heat loss.
- Spray Foam: Let cure per manufacturer’s instructions.
Pay close attention to overlaps at seams and edges. Use insulation tape or spray foam sealant to close any gaps.
Diagram alt: “How to overlap insulation boards on a metal shed roof.”
Seal Gaps and Add Finishing Touches
Seal all edges, corners, and penetrations (e.g., around vents) with spray foam or caulk. For a polished look or added protection, install drywall or plywood over the insulation.
Test and Monitor Performance
Once installed, use an infrared thermometer to check for hot or cold spots. Monitor indoor temperatures and humidity over the next few weeks and adjust vents as needed. If you notice condensation or drafts, add extra sealant or insulation as necessary.
Cost Breakdown and ROI Calculator
Let’s talk numbers. Insulating a metal building roof is an investment—but it pays off quickly in energy savings and comfort.
Material and Labor Costs
Here’s an estimate for a typical 500 sq ft shed:
Insulation Type Cost per Sq Ft Total for 500 sq ft Shed
Spray Foam $2 – $4 $1,000 – $2,000
Rigid Boards $1 – $2 $500 – $1,000
Radiant Barrier $0.50 – $1 $250 – $500
DIY saves an average of 40-60% compared to hiring a contractor.
Payback Period: When It Pays Off
Calculate your return on investment (ROI) easily:
Example:
If you spend $800 insulating your shed and save $300 a year on heating/cooling, your payback period is about 2.7 years. After that, it’s pure savings!
Ready to take your project to the next level? Here are some expert strategies:
- Pair insulation with LED lighting and solar panels for maximum energy efficiency.
- In hot climates, add a radiant barrier (bubble foil) beneath the roof panels to reflect heat before it enters the home.
- Seal windows and doors with weatherstripping to prevent drafts.
- Schedule annual inspections to check for moisture issues or insulation damage.
- Install a programmable thermostat if your shed is heated/cooled.
Troubleshooting Common Issues When Insulating Metal Roofs
Sometimes things don’t go as planned. Here’s how to fix the most common problems:
- Bulging insulation?
- Likely caused by overpacked batts or poor placement of the vapor barrier. Remove, refit, and secure tightly.
- Persistent condensation?
- Check for air leaks or insufficient ventilation. Add more vents and reseal vapor barriers.
- Heat loss after install?
- Use an IR thermometer to locate cold spots. Fill gaps with spray foam or add insulation where needed.