
Home plumbing systems are crucial for ensuring a clean water supply and effective waste removal. While most people take their plumbing for granted, there’s a lot more going on behind the walls and beneath the floors than meets the eye. One critical aspect of plumbing that often goes unnoticed is venting, which helps maintain proper airflow and ensures safe and efficient waste drainage.
What Is a Wet Vent in Home Plumbing?
To put it simply, wet venting is a plumbing method where a single pipe serves two functions—it acts as both a waste drain and a vent. This dual-purpose pipe allows water to flow out from a fixture while also enabling air to flow into the system, which helps maintain proper pressure levels in the plumbing.
How Wet Venting Works
When waste flows through a drainpipe, it displaces air. If there is no vent pipe to replace the displaced air, the resulting vacuum can disrupt the water flow and even allow unpleasant sewer gases to enter your home. A wet vent solves this problem by allowing both wastewater and air to pass through the same pipe in a carefully designed system that balances airflow and drainage.
Key Difference Between Wet Vents and Dry Vents
Unlike dry vents, which only serve to provide airflow and don’t carry wastewater, wet vents are more resource-efficient. They reduce the number of pipes needed in a home’s plumbing system, making the design more straightforward and more cost-effective.
Here’s a quick comparison of wet vents vs. dry vents:
FeatureWet VentDry Vent
Function Carries both wastewater and air Carries only air
Efficiency More space-efficient Requires additional pipes
Cost Typically, lower installation costs, Higher material and labor costs
Usage Ideal for compact plumbing layouts Used in traditional systems
Wet venting is not only practical but also complies with various plumbing codes, provided it is installed correctly.
How Does Wet Venting Work?
The Mechanics of Wet Venting
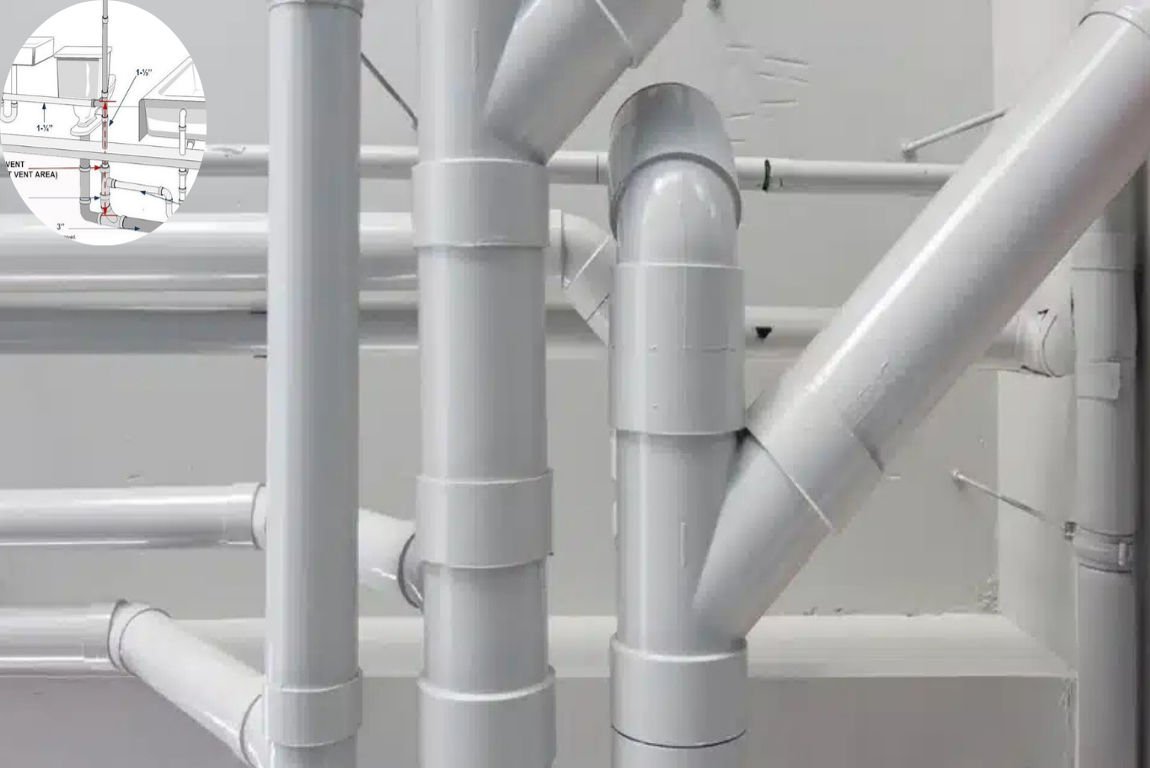
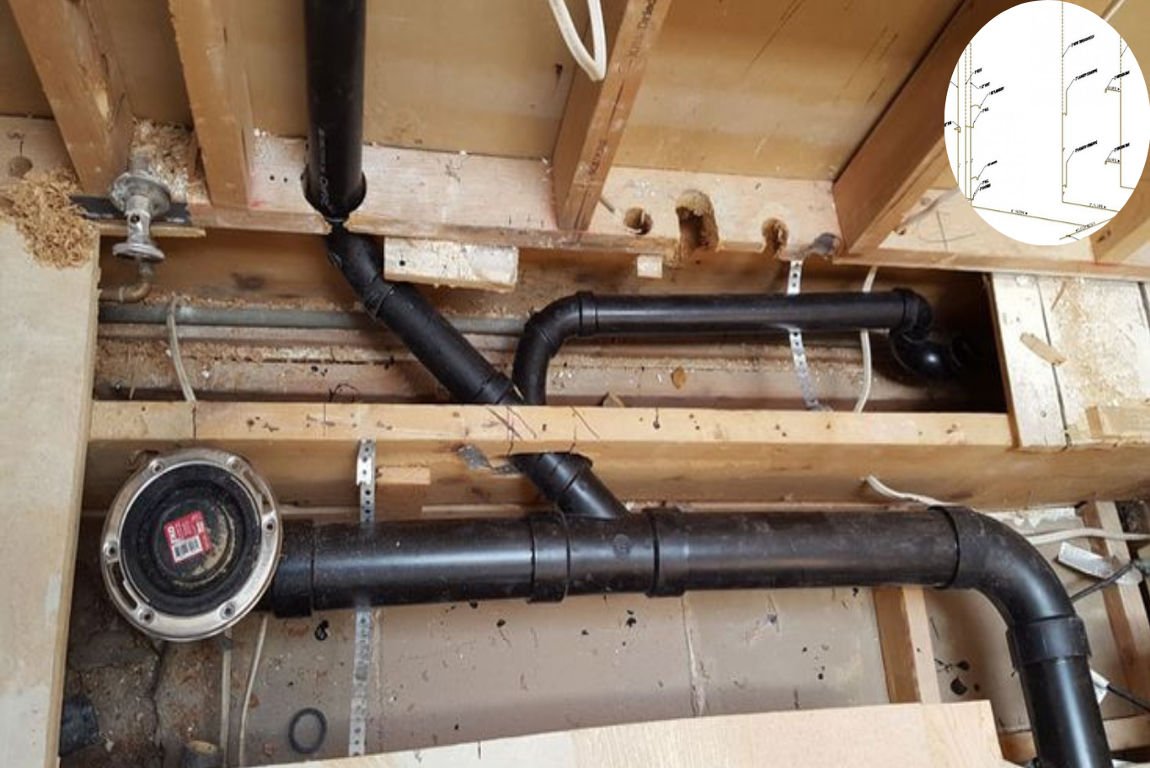
A wet vent system operates by combining the waste drain and venting functions into a single pipe. This pipe is carefully sloped to ensure that waste flows downward while still allowing air to circulate. The design ensures that the water traps in plumbing fixtures remain sealed, preventing sewer gases from entering your home.
You may also read (guide to extending the life of copper pipes in homes).
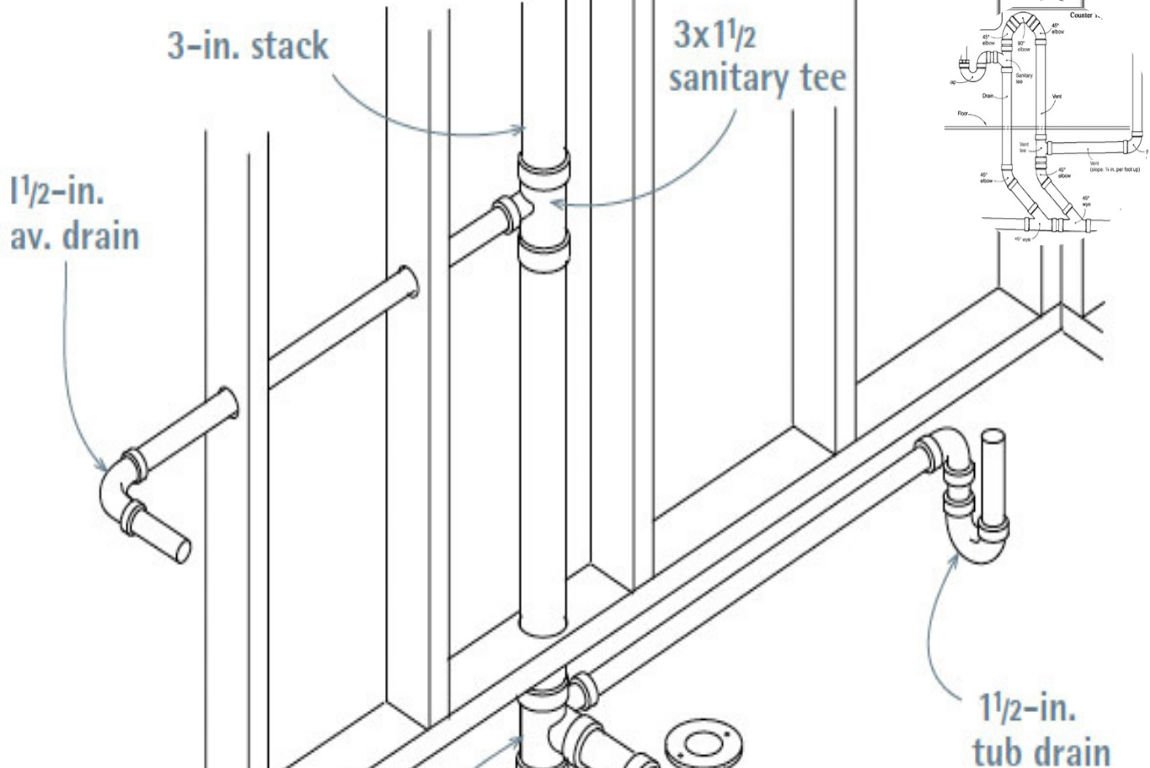
Key Components of a Wet Vent System
The main components of a wet vent system include:
- Primary Wet Vent Pipe: The central pipe that serves as both the drain and vent.
- Connected Fixtures: These are the plumbing fixtures—such as sinks, toilets, and showers—that share the wet vent.
- Vent Stack Connection: A pipe that connects to the damp vent and helps maintain airflow throughout the system.
Importance of Proper Sizing and Layout
For a wet vent system to work effectively, the pipe diameter, slope, and layout must meet specific requirements. For example:
- The pipe diameter must be sufficiently large to accommodate the combined flow of wastewater and air.
- The slope of the pipe must allow water to drain efficiently without blocking airflow.
Wet Vent vs. Dry Vent: Key Differences and When to Use Each
What Are Dry Vents?
Dry vents are dedicated pipes designed solely for airflow. They don’t carry wastewater and are typically installed in traditional plumbing systems where separate pipes are used for venting and drainage.
Advantages of Wet Venting
Wet venting offers several advantages over dry venting:
- Cost-Effectiveness: Since wet vents require fewer materials, they are cheaper to install.
- Space Efficiency: Wet vent systems are ideal for homes with limited space for plumbing.
- Simplified Installation: With fewer pipes to install, wet venting is quicker and easier to set up.
You may also read (guide to proper chimney height for your home).
When to Choose Wet Venting
Wet venting is particularly useful in:
- Small Homes or Apartments: Where space is at a premium.
- Renovations: To simplify plumbing modifications.
- Modern Bathrooms: Where multiple fixtures are grouped.
However, wet venting may not be suitable for every situation. Factors like local plumbing codes and the number of fixtures involved should be considered.
Benefits of Wet Vent Plumbing in Homes
Cost Savings
One of the most significant advantages of wet venting is the reduction in material and labor costs. Fewer pipes mean less expense for homeowners, making it a budget-friendly option.
Space Efficiency
Wet venting is ideal for small or complex layouts where traditional venting systems would require more space. By reducing the number of pipes, it frees up room for other design elements.
Improved Airflow
Wet vents ensure proper airflow in the plumbing system, which helps prevent common issues such as clogs and slow drainage. This improved efficiency reduces the likelihood of future plumbing problems.
Simplified Maintenance
With fewer components, wet vent systems are easier to inspect, clean, and repair. This makes them a practical choice for homeowners looking to minimize maintenance headaches.
Important Plumbing Codes and Rules for Wet Venting
Key Regulations for Wet Vents
Wet venting is governed by specific plumbing codes, such as the Uniform Plumbing Code (UPC). Some important rules include:
- Fixture Placement: All fixtures connected to a wet vent must be on the same floor.
- Toilet Positioning: Toilets must be the last fixture in the wet vent system to ensure proper drainage.
- Pipe Diameter: The pipe must be large enough to accommodate the combined flow of all connected fixtures.
Local Code Variations
It’s crucial to check local plumbing codes before installing a wet vent system. Regulations can vary by region, and compliance is essential for safety and functionality.
How to Install a Wet Vent System: Best Practices
Installing a wet vent system requires expertise and careful planning. Here’s a step-by-step overview of the process:
Plan the Layout
Determine which fixtures will share the wet vent and ensure they are located on the same floor.
Size the Pipes
Calculate the required pipe diameter based on the number of fixtures and their flow rates.
Ensure Proper Slope
The wet vent pipe must be sloped correctly to allow efficient drainage and airflow.
Connect Fixtures
Attach the fixtures to the wet vent pipe, ensuring proper alignment and a secure seal.
Test the System
Before finalizing the installation, test the system for leaks and proper airflow.
Common Problems and Maintenance Tips for Wet Vent Systems
Potential Issues
Wet vent systems can face problems such as:
- Clogs: Caused by debris buildup in the pipe.
- Improper airflow can lead to slow drainage or sewer gas odors.
- Sewer Gas Leaks: If the system is not sealed correctly.
Maintenance Tips
- Regularly clean drains to prevent clogs.
- Listen for gurgling sounds, which may indicate a problem.
- Schedule professional inspections to ensure the system is functioning correctly.
Real-Life Applications and Examples
Bathroom Wet Venting
In many homes, bathrooms with multiple fixtures (like toilets, sinks, and showers) often use a wet vent system. By sharing a single pipe, these systems save space and reduce installation costs.
Case Study: Small Apartment Renovation
A homeowner renovating a small apartment opted for wet venting to simplify the plumbing layout. The result was a cost-effective and efficient system that met all plumbing code requirements.
You may also read (does your homes plumbing system require electricity).