
When it comes to adding a roof to your deck, securely attaching the support posts is one of the most critical steps. Improper installation can lead to severe structural issues, safety risks, and even legal problems if your setup doesn’t comply with local building codes.
Why Proper Installation of Deck Roof Support Posts Matters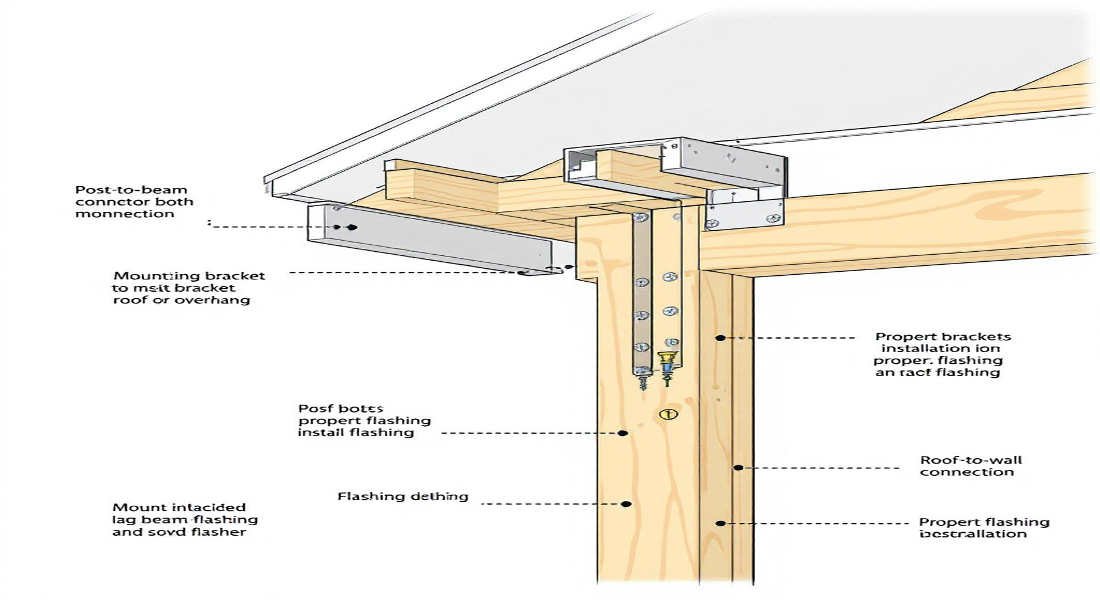
Building a roof over your deck can provide shade, weather protection, and an overall enhancement to your outdoor space. However, the entire structure relies on the strength and stability of the support posts. Improper attachment can result in:
- Structural failure, which may cause the roof to collapse.
- Safety hazards for you, your family, and guests.
- Legal issues if your installation doesn’t meet local building codes.
By following the guidelines outlined in this article, you can ensure a durable and safe installation while also enhancing the longevity of your deck roof.
Understanding Deck Home Roof Support Posts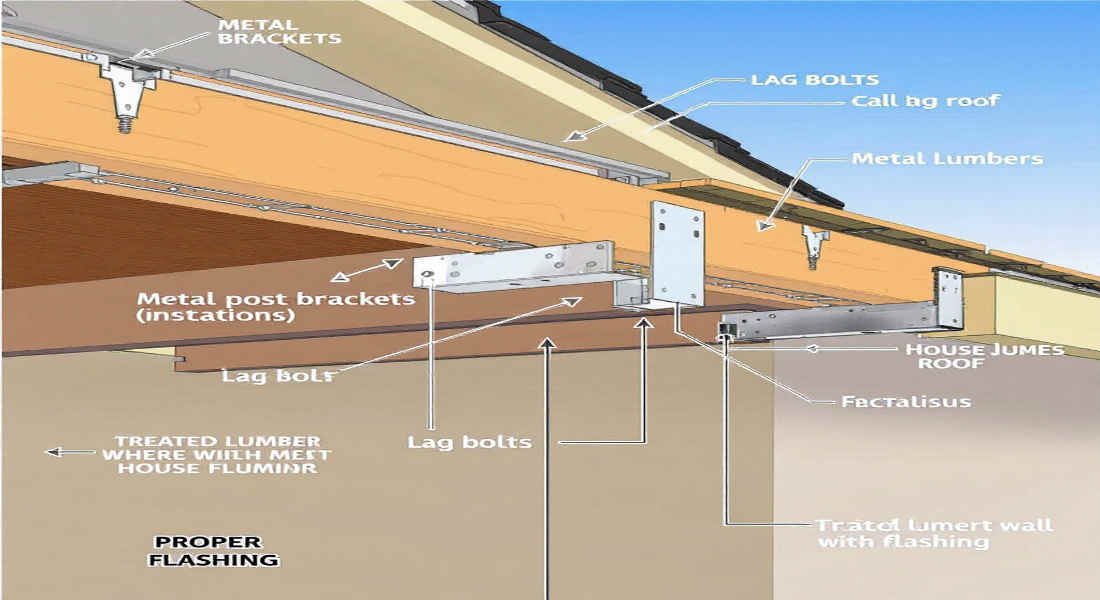
What Are Deck Home Roof Support Posts?
Deck home roof support posts are vertical structures that bear the weight of the roof above your deck. These posts transfer the roof’s load to the ground or the deck framing, ensuring the entire structure remains stable and secure. Without properly installed support posts, your deck roof may sag, become unstable, or fail altogether.
You may also read (necessary for home roof sheathing).
Types of Support Posts:
- Wooden posts (pressure-treated, cedar, redwood): Popular due to their affordability and ease of use.
- Metal posts (steel or aluminium): Great for durability and modern aesthetics.
- Composite posts: Resistant to weather and rot, though pricier than wood.
Why Secure Attachment Matters
Properly attaching deck roof support posts is essential for several reasons:
- Structural Integrity: A secure attachment ensures the roof remains stable under various loads, such as wind, snow, or heavy rain.
- Safety: Prevents accidents caused by loose or unstable posts.
- Compliance with Building Codes: Many regions have strict regulations regarding deck construction. Adhering to these rules avoids fines or the need for costly repairs later.
- Longevity: Proper attachment extends the lifespan of your deck roof by preventing damage caused by movement or environmental factors.
Planning for Installation
Before diving into the actual installation, thorough planning is essential. This includes checking building codes, selecting materials, and mapping out post locations.
Check Local Building Codes and Permits
Every municipality has specific guidelines for deck construction, including roof support posts. These regulations typically specify:
- Minimum post size (e.g., 4×4 or 6×6).
- Spacing between posts.
- Load-bearing requirements.
- Approved fastening methods.
Neglecting to follow these rules can result in fines, failed inspections, or unsafe construction. Visit your local government’s website or consult a building inspector to ensure compliance.
Choosing the Right Materials
The materials you choose play a significant role in the stability and durability of your deck roof. Here’s what you’ll need:
- Post materials: Pressure-treated wood is ideal due to its resistance to decay and insects. Metal or composite posts are excellent alternatives for specific designs.
- Fasteners: Use galvanized lag bolts, carriage bolts, or stainless-steel screws to prevent rust.
- Post bases/anchors: These provide a stable foundation and protect wood posts from moisture damage.
Measuring and Marking Post Locations
Accurate measurements are crucial for an even and balanced roof structure. Follow these steps:
- Measure Post Spacing: Use your deck’s beam layout as a guide and ensure posts are evenly spaced.
- Align with Joists or Beams: Posts should align with the deck’s framing to evenly distribute weight.
- Mark Locations: Use chalk or a pencil to mark where each post will be installed.
Tools and Materials Needed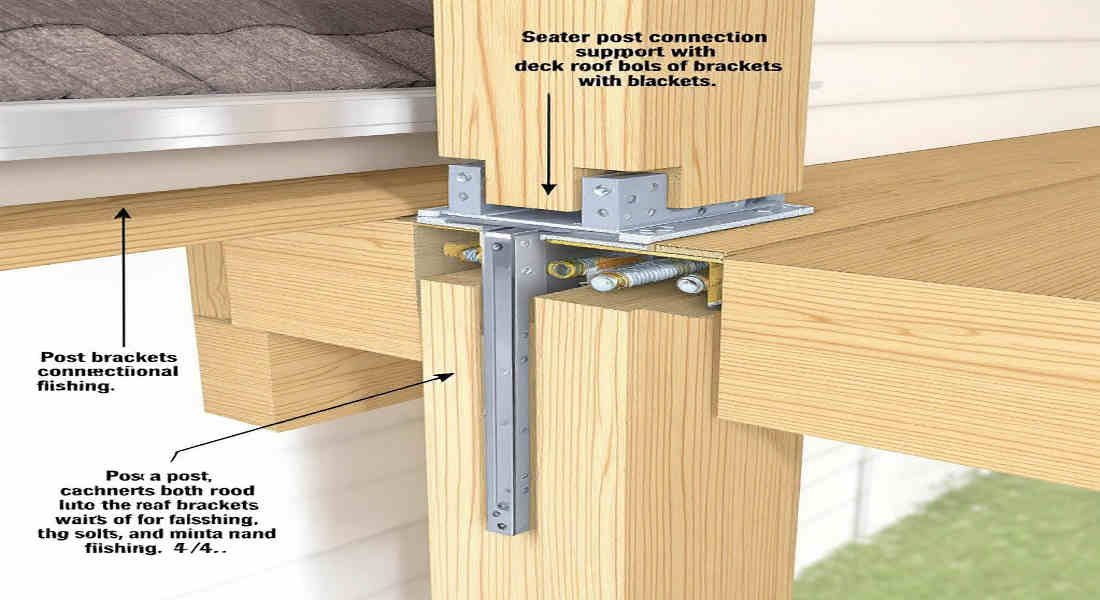
Before starting the installation process, gather all the necessary tools and materials. Preparing everything in advance will save time and avoid interruptions.
Essential Tools
- Drill with appropriate bits
- Measuring tape
- Level (for plumb alignment)
- Saw (circular or mitre)
- Wrench or socket set
- Safety gear (gloves, goggles, hearing protection)
Materials Checklist
MaterialPurpose
- Pressure-treated wood posts, Primary structural support
- Galvanized fasteners prevent rust and ensure durability
- Post bases/anchors stabilize posts and protect them from rot
- Blocking material adds support when posts aren’t over joists
- Wood preservative protects cut ends and exposed wood
You may also read (discover the charm of a home cupola roof).
Step-by-Step Guide: How to Attach Deck Home Roof Support Posts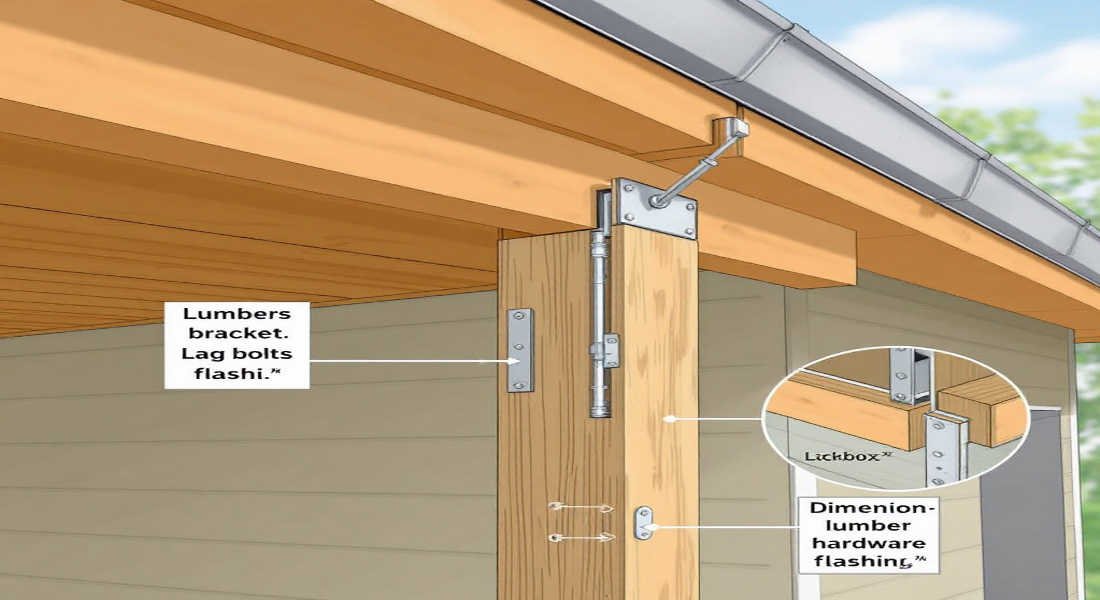
Using Post Bases or Anchors
Post bases or anchors are commonly used to attach posts to the deck surface. They are ideal for light to moderate roof loads.
Installation Steps:
- Position the post based on the deck surface and align it with your markings.
- Drill pilot holes to prevent splitting.
- Secure the base with galvanized lag screws.
- Insert the post into the base and check for plumb alignment using a level.
- Fasten the post to the base using screws or bolts.
Pros: Easy installation, protects posts from ground moisture.
Cons: May not provide enough stability for heavy roofs.
Through-Bolting for Maximum Strength
Through-bolting is the strongest method and is recommended for heavy or large roof structures.
Installation Steps:
- Position the post against a joist or beam.
- Drill holes through the post and framing.
- Insert carriage bolts through the holes, then secure with washers and nuts.
- Tighten the bolts to eliminate any wobbling.
Pros: Maximum strength, ideal for heavy loads.
Cons: Requires underside access to the deck.
Blocking and Reinforcement
If you can’t position a post directly over a joist or beam, blocking can provide the necessary support.
Installation Steps:
- Measure and cut blocking material to fit between joists.
- Secure the blocking in place with screws.
- Position the post over the reinforced area.
- Attach the post using lag screws or carriage bolts.
Pros: Distributes weight evenly, adds structural strength.
Cons: Requires more time and effort.
Ensuring Structural Integrity
Once your posts are installed, double-check their stability and alignment:
- Double-Check Measurements: Ensure all posts are evenly spaced and aligned.
- Levelling and Plumbing: Use a level to confirm that posts are perfectly vertical.
- Tighten Fasteners: Make sure all bolts and screws are fully tightened.
- Apply Moisture Protection: Use wood preservative on cut ends and bases to prevent rot.
Common Mistakes and How to Avoid Them
Even experienced DIYers can make mistakes during installation. Here are some common pitfalls to avoid:
- Skipping code checks: Always verify local regulations before starting.
- Using undersized posts: Ensure posts are strong enough to support the roof.
- Misaligned posts: Measure and mark locations carefully.
- Insufficient fastening: Use high-quality fasteners for a secure connection.
- Ignoring moisture protection: Protect posts from rot by sealing exposed wood.
Maintenance Tips for Deck Home Roof Support Posts
Regular maintenance will keep your deck roof support posts in excellent condition:
- Inspect posts annually for signs of rot, rust, or movement.
- Tighten bolts and screws as needed.
- Reapply wood preservatives or sealants to prevent decay.
- Address drainage issues to keep water away from post bases.
You may also read (roof coatings for your home).