
Imagine this: You’re finally ready to refresh your home’s floors. The samples are spread out, the color charts are in hand, and then you hit a snag: Do you have to remove vinyl flooring before installing laminate? It’s a common scenario for homeowners mid-renovation, and it can make all the difference in your project’s time, cost, and long-term satisfaction.
Let’s be honest—flooring upgrades are exciting, but the logistics can quickly become overwhelming. You might be thinking, “Can I just lay laminate over my old vinyl?” or “Will skipping removal come back to haunt me?” The answer isn’t always straightforward. In some cases, you can install laminate over vinyl, saving hours of labor and a good chunk of cash. Other times, you’ll need to tear out that old floor for a safe, lasting installation.
Here’s a surprising fact: Over 60% of U.S. homes have vinyl flooring (Statista, 2025), while laminate is one of today’s top choices for affordability and style. Understanding the right way to transition from vinyl to laminate is critical to getting the best results.
Understanding Vinyl and Laminate Flooring Basics

What is Vinyl Flooring?
Vinyl flooring is a synthetic, resilient option found in millions of homes. It comes as sheets, tiles, or planks, and is installed using glue-down, click-lock, or loose-lay methods. Vinyl’s flexibility, waterproof qualities, and easy cleaning make it common in kitchens, bathrooms, and laundry rooms. Many vinyl floors last 20–50+ years with proper care.
Laminate Flooring Essentials
Laminate is a floating floor system made of a high-density fiberboard (HDF) core, topped with a photo-realistic design layer and a durable wear layer. It’s known for its affordability and variety of wood-look finishes. Most laminate planks are 6–12mm thick and require a smooth, stable subfloor to prevent movement, noise, or damage.
Why Compatibility Matters
Vinyl is flexible and can hide minor subfloor imperfections. Laminate, on the other hand, is rigid. If it’s installed over an uneven or unstable base, you risk clicking sounds, gaps, or even plank failure. Incompatible flooring layers can also void warranties and invite moisture problems.
Quick Compatibility Quiz
Is your vinyl a good candidate for a laminate overlay? Ask yourself:
- Is the vinyl securely glued with no loose seams or tiles?
- Are there any signs of peeling, bubbling, or moisture damage?
- Is the vinyl flooring over 20 years old (possible asbestos risk)?
- Is the subfloor underneath wood, concrete, or another material?
- Is the surface flat and free from deep dents or ridges?
If you answered “no” to any of them, removal may be wise.
Vinyl vs. Laminate Compatibility Table
Vinyl Type & Condition: Laminate Overlay?Notes
Flat, glued sheet vinyl. Yes, a Clean & dry surface is required
Loose-lay vinyl planks/tiles No Risk of movement/instability
Peeling, damaged vinyl. Must remove and repair
Vinyl over radiant heat. Maybe check the manufacturer’s guidelines
Old (pre-1980s) vinyl: No Test for asbestos first
Do You Have to Remove Vinyl? Pros, Cons, and When to Skip It
Short Answer: Not Always
You don’t always need to remove vinyl flooring before installing laminate. If your existing vinyl is flat, securely glued, and free from asbestos or significant damage, many experts agree you can lay laminate right over it. However, there are substantial trade-offs to consider.
Pros of Leaving Vinyl in Place
- Saves Time: No need to spend 1–2 extra days tearing out floors and scraping glue.
- Reduces Labor Costs: DIYers save $0.50–$1 per sq ft; pros may charge more.
- Protects Subfloor: Less risk of damaging plywood or concrete underneath.
- Quieter install: Vinyl can act as a sound-dampening underlayment.
- Less Mess: Avoids dust, debris, and disposal headaches.
Cons of Overlaying Laminate
- Warranty Risks: Some brands (like Pergo) void warranties if installed over soft or loose vinyl.
- Height Buildup: Can cause issues at doorways, appliances, and baseboards.
- Hidden Moisture: If vinyl traps moisture, it can lead to mold or plank warping.
- Uneven Wear: Any imperfections under the vinyl may show up as bouncy or noisy laminate spots.
- Code Issues: Some local building codes require old flooring for safety.
Decision Table: Remove or Overlay?
Vinyl ConditionRemove?Reason
Flat, secure glue-down . No Stable base for laminate
Loose/peeling tiles, Yes, Instability and movement
Over concrete, Maybe Check for moisture levels
Step-by-Step Guide: Removing Vinyl Before Laminate
When you’re dealing with damaged, loose, or likely asbestos-containing vinyl, or if your subfloor needs repair, removal is the safest bet. Here’s how to tackle the process, whether you’re a DIYer or hiring a pro.
When Removal Is Required
- Possible asbestos (vinyl installed before the 1980s)
- Thick adhesive layers that prevent a flat surface
- Subfloor repairs are needed due to water or rot
- Peeling, bubbling, or soft spots in vinyl
Tools and Materials List
- Heat gun or hair dryer
- Floor scraper or putty knife
- Pry bar
- Utility knife
- Safety gloves and a mask
- Dust mask/respirator (if asbestos suspected)
- Trash bags or bins
- Adhesive remover (for glue spots)
- Leveling compound (for subfloor prep)
- Moisture meter
Prep Steps
- Test for Asbestos: If your vinyl is older than 1980, use a home test kit ($30–$50) or hire a professional.
- Clear the Room: Move furniture, appliances, and baseboards.
- Score Seams: Use a utility knife to cut along seams to make removal easier.
Vinyl Removal Process
- Heat and Scrape: For glued-down vinyl, gently heat a small section with a heat gun to soften the adhesive. Use a floor scraper to lift the vinyl from the subfloor.
- Pry Up Tiles: For vinyl tiles, slide a putty knife or pry bar under the edge and lift each tile. Watch for stubborn spots and use heat if needed.
- Handle Sheet Vinyl Rolls: Roll up sections as you go, slicing with a utility knife for more straightforward disposal.
- Clean Subfloor: Remove all adhesive residue using a scraper and adhesive remover. The cleaner and smoother the subfloor, the better your laminate will perform.
Post-Removal Subfloor Prep
- Level the surface with a compound if you find dips or high spots.
- Test for moisture with a meter; ideal readings are below 12%.
- Vacuum thoroughly to remove dust and debris.
Pro Tip: Time & Cost
- DIY cost: $1–$3 per sq ft (tools, supplies)
- Pro removal: $3–$7 per sq ft (labor, disposal)
- Time: Small rooms (100 sq ft) can take 4–8 hours; larger jobs may require 2–3 days.
Infographic Idea: “Removing vs. Overlaying Vinyl—Time and Cost Benchmarks”
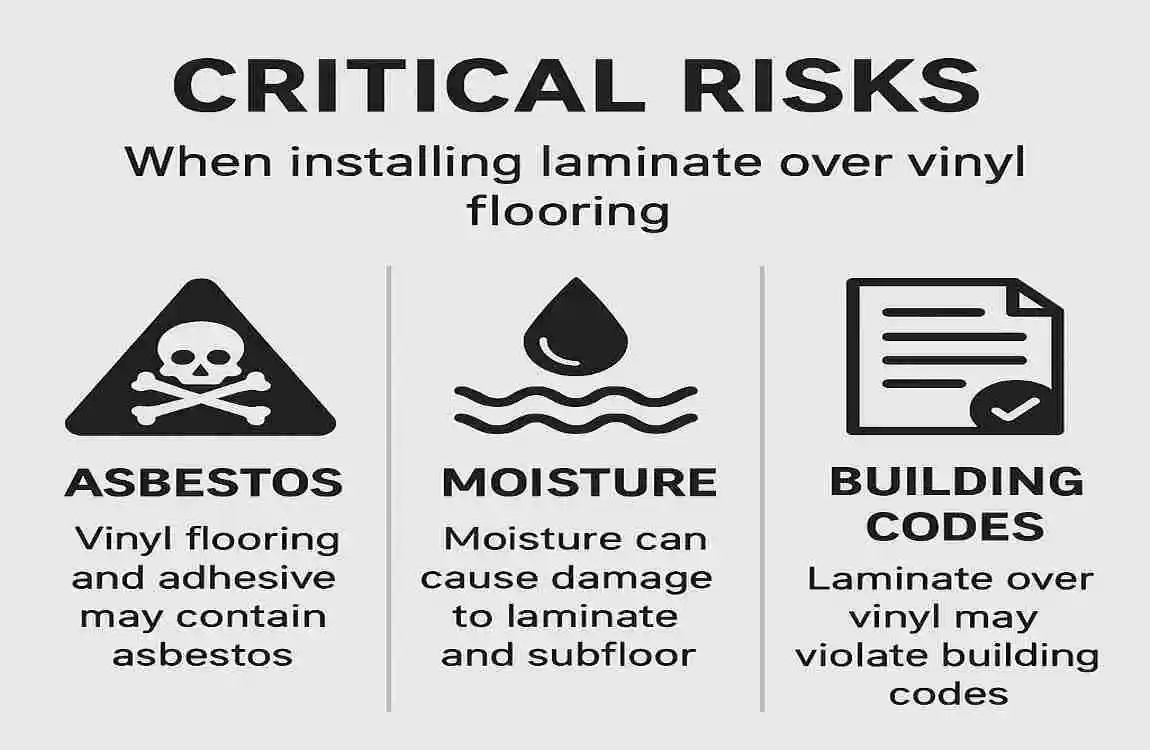
Critical Risks: Asbestos, Moisture, and Building Codes
Asbestos in Vinyl: What You Need to Know
One of the most significant risks with older vinyl flooring is asbestos. If your floors date back to the 1980s or earlier, they could contain this hazardous material in the backing or adhesive. Disturbing asbestos releases fibers that can cause serious health issues, including lung cancer and mesothelioma.
- Test kits are widely available ($30–$50) and can give you peace of mind.
- If your floor tests positive, do not attempt DIY removal. Hire certified professionals. Costs can range from $10–$20 per sq ft, but are essential for safety.
Moisture and Mold Risks
Vinyl is water-resistant, but if moisture gets trapped between layers, it can quickly become a breeding ground for mold and mildew. Always use a moisture meter to test the subfloor; readings should be below 12%. If moisture is present, address leaks or humidity problems before proceeding with the laminate.
Local Codes and Warranties
Building codes vary by state and often dictate whether you can install new flooring over old. The International Residential Code (IRC) typically requires the removal of old flooring over wood subfloors for new installations. Additionally, most flooring manufacturers want a clean, flat, and stable subfloor to maintain the warranty on your new laminate.
- California: Stricter on asbestos testing/removal.
- Northeast/Midwest: Codes may require vapor barriers over concrete.
- South/Southwest: Moisture concerns are common.
Risk Checklist Table
Risk Factor: How to Check Solution
Asbestos Test kit/lab Hire abatement pros if positive
Moisture Moisture meter Seal/repair leaks; use vapor barrier
Loose vinyl, Visual/touch, Remove and repair subfloor
Warranty void. Read warranty docs. Follow install guidelines
Alternatives to Full Removal
Not ready to commit to a complete flooring teardown? Here are some practical alternatives to consider:
Overlay If Possible
If your vinyl passes the flatness and adhesion tests, overlaying with laminate is a valid shortcut. Here’s how to do it right:
- Clean thoroughly: Remove all dirt and debris.
- Acclimate laminate: Let your new flooring sit in the room for at least 48 hours.
- Lay underlayment: Use foam or manufacturer-recommended underlayment for best results.
- Check transitions: Trim doors and add threshold strips if needed.
Hybrid Options
Some products are designed for situations like yours. Vinyl plank underlayment or hybrid underlayments combine moisture barriers with sound-dampening, making them suitable for installations over secure vinyl.
Other Floorings Over Vinyl
If you’re open to alternatives, luxury vinyl plank (LVP) can be installed directly over most vinyl floors, offering even more moisture resistance and flexibility.
Hire vs. DIY: Cost Comparison
Option Cost per sq ft Time
Remove + Laminate $4–$7 2–3 days
Overlay Laminate $2–$4 1 day