
Hey there, reader! Imagine stepping into your bathroom and seeing a mess of toiletries everywhere, all because those fancy vanities cost a fortune. It’s a common headache. Well, what if I told you there’s a clever way around it? Can you use kitchen cabinets in a bathroom? Yes, absolutely! This smart swap can transform your space into something stylish and functional without breaking the bank. We’re talking savings of up to 50% compared to buying dedicated bathroom vanities, plus endless ways to customise for that perfect look.
Why Kitchen Cabinets Work Perfectly for Bathrooms
Let’s cut to the chase: kitchen cabinets aren’t just for kitchens anymore. They’re a fantastic fit for bathrooms because they’re versatile, sturdy, and wallet-friendly. Picture this – you grab a basic kitchen base cabinet, tweak it a bit, and boom, you’ve got a custom vanity that looks high-end. But why does this even work? Let’s break it down.
First off, think about the materials. Kitchen cabinets often use tough materials like plywood or solid wood, which can withstand daily use. In a bathroom, that means they hold up against splashes and steam better than you might expect. Sure, they’re not made specifically for wet areas, but with a bit of prep, they shine. And the styles? From sleek modern to classic shaker, you can match any decor. It’s like giving your bathroom a personality upgrade without the hefty price tag.
Now, let’s talk savings. Home renovation data shows that bathroom vanities can run you hundreds or even thousands of dollars. Kitchen cabinets? Often 30-50% cheaper. You get more bang for your buck, plus the freedom to customise. Want a bigger sink area? Easy – kitchen cabinets come in a range of sizes.
But don’t just take my word for it. Here’s a quick pros and cons table to see the big picture:
AspectProsCons & Fixes
Cost: 30-50% cheaper than bathroom vanities. N/A – the savings are built in!
Style Modern or shaker options match any decor. Customise with paint or new handles for a perfect fit.
Size: Scalable for small or large spaces. Measure precisely to avoid fit issues; add legs if needed.
See? The pros outweigh the cons big time. For instance, if you’re dealing with a tiny powder room, a compact kitchen cabinet can squeeze in perfectly. Or in a spacious master bath, stack them for extra storage. It’s all about flexibility.
Answering ‘Can You Use Kitchen Cabinets in a Bathroom’ – Myths Busted
One big myth is that kitchen cabinets will warp in bathroom humidity. Not true! With proper sealing, they last for years. Another? They look out of place. Nope – paint them to blend with your tiles, and they feel custom-made. I’ve seen homeowners turn basic stock cabinets into luxurious setups. What about you? Have you dismissed this idea before? Give it a shot; you might be surprised.
Experts in home renovations agree: using kitchen cabinets cuts costs without sacrificing quality. Data from renovation surveys highlight how this hack saves an average of $500 – $1,000 per project. It’s not just cheap; it’s smart. Plus, materials like laminate fronts naturally resist moisture, making them ideal for steamy spaces.
In short, kitchen cabinets bring style, savings, and strength to your bathroom. They’re like the Swiss Army knife of storage solutions. Ready to overcome any roadblocks? Let’s move on to the challenges.
Key Challenges and How to Overcome Them
Okay, so you’re excited about using kitchen cabinets in your bathroom, but what about the hurdles? Don’t worry – every great hack has them, and they’re totally fixable. We’ll tackle the big ones like moisture, sizing, and plumbing. By addressing these upfront, you’ll build trust in the process and avoid costly mistakes. Let’s dive in, step by step.
Moisture and Humidity Resistance
Bathrooms are like steam rooms sometimes. All that hot water from showers creates humidity that can damage wood. Why does this matter? Unprotected cabinets might swell or peel over time. But here’s the good news: you can fight back with simple fixes.
Start by choosing the right materials. Go for solid wood like maple or oak, or even laminate fronts – they’re naturally tougher against moisture. Avoid cheap particleboard if possible; it soaks up water like a sponge.
Next, seal everything. Grab some marine-grade polyurethane – it’s like a waterproof shield. Apply it in thin layers, letting each dry thoroughly. This keeps steam out and your cabinets looking fresh. Oh, and don’t forget ventilation! Install a good exhaust fan to suck out humid air. It makes a huge difference in keeping things dry.
Imagine your bathroom staying mould-free and stylish for years. That’s what these hacks deliver. Pro tip: test a small area first to ensure the sealant works with your cabinet’s finish.
Sizing and Installation Fit
Size matters in tight spaces like bathrooms. Kitchen cabinets are standard – usually 24 inches deep and 34.5 inches high – but vanities often need to be 30-36 inches tall for comfort. How do you make it work?
Measure twice, cut once. Here’s a quick checklist:
- Check your bathroom’s layout: Measure wall space, door swings, and sink placement.
- Adjust height: Add furniture legs or a platform to raise the cabinet.
- Fit the depth: If it’s too deep, trim the back slightly for a snug fit.
Installation is key too. Secure them to wall studs for stability – no wobbly vanities here! Use a level to keep everything straight. If you’re new to this, grab a friend to help. It’s easier and more fun that way.
These tweaks turn a standard kitchen cabinet into a perfect fit for a bathroom. You’ll wonder why you didn’t try it sooner.
Plumbing and Functionality Tweaks
Plumbing can be tricky – sinks and pipes need space. But with a jigsaw and some planning, it’s doable.
First, trace your pipes on the cabinet back. Cut out holes carefully, then waterproof the edges with silicone caulk. This prevents leaks from sneaking in.
For functionality, add soft-close drawers. They’re great for storing towels or toiletries without slamming. Under-sink organisers from kitchen kits keep cleaners tidy, too.
Think about usability: Can you reach everything easily? Adjust shelves as needed. These small changes make your setup practical and pretty..
Step-by-Step DIY Guide: Transforming Kitchen Cabinets into Bathroom Vanities
Ready to roll up your sleeves? This numbered guide walks you through turning a plain kitchen cabinet into a stunning bathroom vanity. It’s perfect for DIY beginners, with tips to save time and money. We’ll use keyword variations like “kitchen cabinets in bathroom vanity DIY” to keep it searchable, but focus on the fun. Expect to spend a weekend on this – and save hundreds!
- Select the Right Cabinet
- Start by picking a base cabinet that fits your space. Brands like IKEA offer budget options under $100, while Home Depot has sturdy stock ones. Go for base models (no tops) in sizes like 36 inches wide. Why Base? They’re stable and easy to convert. Check for solid construction – avoid flimsy ones. Measure your bathroom first: Will it fit under the sink? This step sets the foundation for a seamless project.
- Prep for Moisture
- Bathrooms get wet, so protect your cabinet. Sand the surfaces lightly to remove gloss, then apply a primer. Follow with two coats of marine-grade sealant – it’s rugged against humidity. Let it dry overnight between coats. This creates a barrier that keeps wood from warping. Pro tip: Work in a well-ventilated area. Your cabinet will thank you by lasting 10+ years.
- Customize Dimensions
- Kitchen cabinets might be too short for vanities, so add height. Attach adjustable legs (about $20 a set) to reach 36 inches. Trim toe kicks if they’re in the way – a saw makes quick work of it. For width, combine two cabinets side-by-side for larger spaces. Measure everything against your bathroom layout. This customisation makes it feel bespoke, not borrowed.
- Plumbing Integration
- Now for the pipes. Place the cabinet in position and trace pipe locations on the back. Use a jigsaw to cut neat holes – go slow to avoid splintering. Seal the cut edges with waterproof caulk to block moisture. Test-fit the sink; adjust as needed. If pipes are tricky, consider flexible connectors from the hardware store. This step ensures everything flows smoothly – literally!
- Finishing Touches
- Top it off with a countertop like quartz (durable and stylish). Swap hardware for something spa-like, as matte-black pulls. Paint if you want a colour match to your tiles. Add shelves inside for organised storage. These details elevate the look from basic to beautiful. Step back and admire – you’ve created a custom piece!
- Install Securely
- Anchor the cabinet to wall studs using brackets for safety. Level it with shims if the floor’s uneven. Connect plumbing last, then caulk around edges for a waterproof seal. Turn on the water and check for leaks. Done! Your new vanity is ready. Celebrate with a relaxing bath.
10 Smart House Hacks for Stylish, Budget-Friendly Storage
Who doesn’t love a good hack? Here are 10 ways to use kitchen cabinets for bathroom magic. Each saves money (like $200 vs. $800 retail) and adds style. Let’s list them out with quick explanations.
- Hack 1: Shaker Style with Matte Black Hardware
- Grab shaker kitchen cabinets and add black handles for a spa-like vibe. Paint them soft grey to match the tiles. Cost: $150 total. It turns a simple cabinet into a focal point.
- Hack 2: Floating Shelves from Wall Cabinets
- Mount upper kitchen cabinets as open shelves for towels. Remove doors for an airy feel. Savings: $100 vs. custom shelves. Perfect for small bathrooms.
- Hack 3: Repurpose Lazy Susans
- Install kitchen lazy Susans under the sink for spinning access to cosmetics. No more digging! Budget: $20 add-on. Keeps clutter at bay.
- Hack 4: Under-Sink Pull-Outs
- Use drawer kits from kitchen sections for sliding storage. Fits cleaners perfectly—savings: 50% off retail organisers.
- Hack 5: Mix and Match Uppers
- Combine different upper cabinets for an eclectic open storage look. Display lotions stylishly. Cost: $200 project.
- Hack 6: Paint Match to Tiles
- Colour kitchen cabinets to match your bathroom tiles. Seamless and chic. Savings: DIY paint job under $50.
- Hack 7: Add LED Strips
- Stick LED lights inside cabinets for illuminated vanities. Great for makeup routines. Budget-friendly at $30.
- Hack 8: Vintage for Farmhouse Charm
- Salvage old kitchen cabinets, refinish them rustic. Fits farmhouse baths—savings: Up to 70% reusing.
- Hack 9: Stackable Linen Towers
- Stack tall kitchen cabinets as towers for linens. Add doors for hidden storage—cost: $250 total.
- Hack 10: Eco-Friendly Refinishing
- Refinish salvaged cabinets with eco-paints. Sustainable and stylish. Savings: $300 vs. new buys.
Real-Life Examples and Before/After Transformations
Let’s bring this to life with stories from real homeowners. These examples show how kitchen cabinets revamp bathrooms on a budget.
Take Sarah’s small powder room. Before: Cluttered countertop, no storage. She used a 24-inch kitchen base cabinet, sealed it, and added a marble-look top. After: Sleek vanity with room for essentials. Total cost: $300. It looks twice as big!
Then there’s Mike’s master bath. Before: Outdated vanity is eating into the budget. He repurposed two IKEA kitchen cabinets, stacked them, and painted them white. After: Luxe setup with pull-out drawers. Savings: $700. Friends thought it was custom.
Another gem: A family turned vintage kitchen finds into a farmhouse oasis. Before: Bland space. After: Charming cabinets with open shelves. They shared pics on social media – instant inspiration!
Cost Breakdown and Savings Calculator
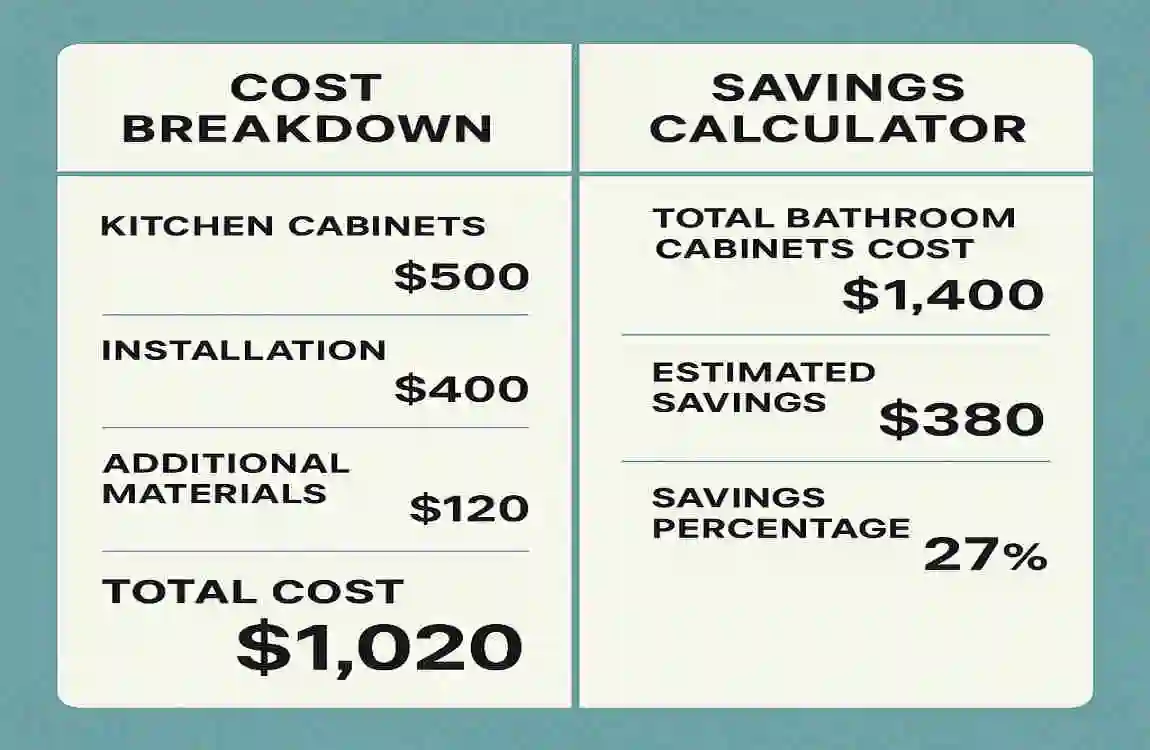
Curious about the numbers? Here’s a table breaking down costs for a typical 36-inch setup. Use this simple formula: Savings = Vanity Price – (Cabinet + 20% Materials).
ItemKitchen Cabinet CostBathroom Vanity CostSavings
36″ Base $150 $400 63%
Countertop $100 $250 60%
Total Project $500 $1200 $700
See the wins? Factor in $50 for sealants, and you’re still ahead.
Maintenance Tips for Longevity
Keep your setup fresh with these tips. Kitchen cabinets can last 15+ years in bathrooms with care.
- Wipe down seals monthly to prevent buildup.
- Avoid direct water splashes; use mats.
- Refresh sealant yearly for ongoing protection.
- Ventilate after showers to reduce humidity.
- Compare: Treated cabinets outlast untreated by years.