
Have you ever spent your Saturday morning scrubbing your windows, only to step back and see streaks ruining your view? You’re not alone! Many homeowners struggle with getting that perfect, streak-free shine. But what if you could master window cleaning and enjoy crystal-clear panes that brighten your home and let in up to 20% more natural light? Imagine the difference: sunlight streaming in, vibrant views, and a house that feels instantly fresher.
Essential Tools and Supplies for Streak-Free Window Cleaning
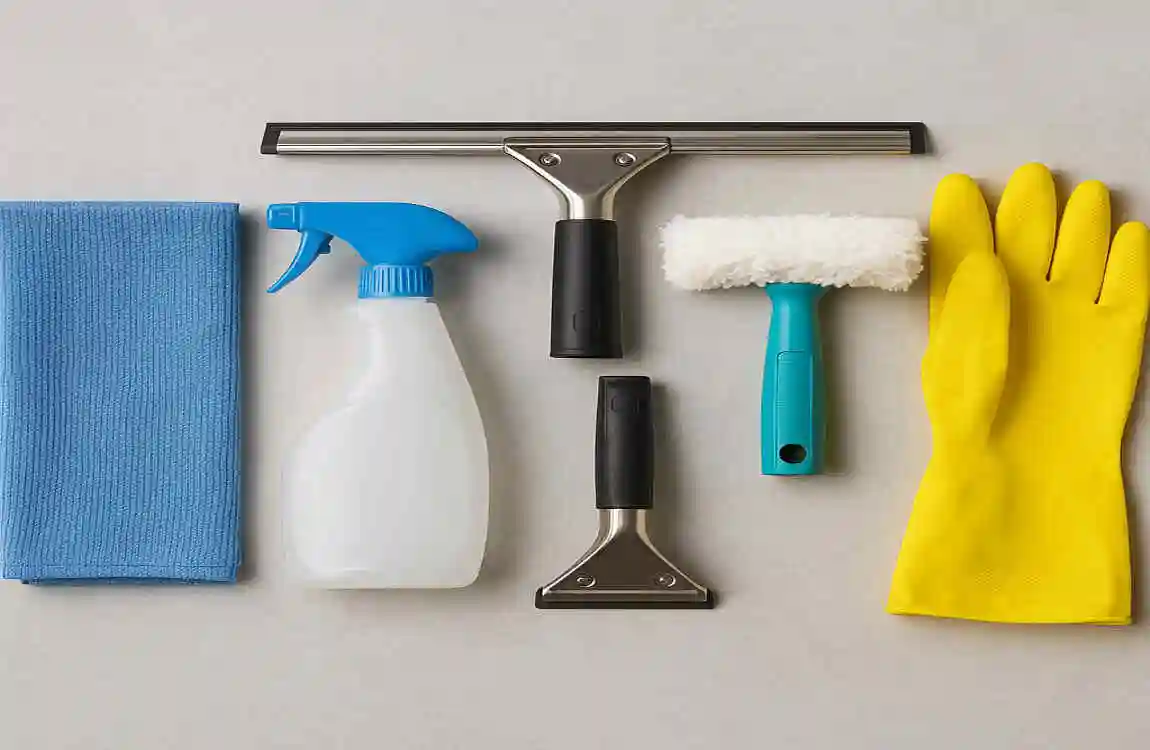
Before you start, it’s crucial to gather the right tools. Using the proper supplies not only makes the job easier but also prevents those dreaded streaks and smudges.
Must-Have Window Cleaning Tools
- Microfiber Cloths:
- These are lint-free and highly absorbent, making them perfect for buffing glass without leaving fibres behind. Unlike paper towels, which can shed and cause streaks, microfiber cloths grab dirt and moisture efficiently.
- Squeegee:
- A professional-grade squeegee with a rubber blade is essential for large panes. It quickly removes cleaning solution and water, leaving a streak-free finish.
- Bucket, Sponge, and Scrubber:
- Use a bucket for mixing your cleaning solution, a sponge for applying it, and a scrubber for tackling stubborn grime.
- Distilled Water:
- Tap water often contains minerals that can leave spots. Distilled water ensures a spotless, streak-free result.
- Spray Bottle:
- Perfect for applying DIY solutions evenly across the glass.
Pros and Cons Table
ToolWhy Use ItAvoid
Microfiber Cloth Absorbs without lint Paper towels (leave fibres)
Squeegee Streak-free drying Windex alone (can leave residue)
Distilled Water No hard water marks Tap water (can cause mineral spots)
Where to Buy Supplies Affordably
You can find these tools at most hardware stores, big-box retailers, or online marketplaces. Look for multi-packs of microfiber cloths and professional squeegees for the best value. Many stores offer window cleaning kits that bundle essentials at a discount.
Pro Tip:
Investing in quality tools pays off in the long run. Cheap squeegees or cloths may save money upfront, but often lead to frustration and subpar results.
Best DIY Cleaning Solutions for Streak-Free Windows
Store-bought cleaners can be convenient, but DIY solutions often outperform them—especially when you want to clean windows without streaks. Plus, they’re natural, cost-effective, and safe for your family.
Top DIY Window Cleaner Recipes
Vinegar-Water Mix (1:1 Ratio)
- Why it works:
- Vinegar cuts through grease and grime, leaving glass sparkling.
- How to mix:
- Combine equal parts distilled white vinegar and distilled water in a spray bottle.
- Best for:
- Every day, cleaning and removing fingerprints.
Dish Soap Solution
- Why it works:
- A tiny amount of dish soap (about 1 teaspoon per gallon of water) helps break down stubborn dirt and soap scum.
- How to mix:
- Add dish soap to a bucket of warm, distilled water, then stir gently.
- Best for:
- Heavily soiled windows or those with oily residue.
Cornstarch Slurry
- Why it works:
- Cornstarch acts as a gentle abrasive, polishing glass to a high shine.
- How to mix:
- Dissolve 1 tablespoon of cornstarch in 1 quart of warm water. Shake well before use.
- Best for:
- Final polish after cleaning.
Safety Tips
- Avoid ammonia-based cleaners indoors:
- Ammonia fumes can be harsh and irritating, especially in enclosed spaces.
- Test on a small area first:
- Always check your solution on a corner of the glass to ensure it doesn’t damage any coatings or tints.
Pro Tip:
Label your spray bottles and store them safely out of reach of children and pets.
Preparation Steps: Setting the Stage for Success
Proper preparation is the secret to a flawless finish. Skipping these steps can lead to re-soiling and wasted effort.
Dust and Vacuum Sills, Tracks, and Cobwebs
Start by vacuuming or dusting window sills, tracks, and frames. This removes loose dirt and prevents it from turning into muddy streaks when wet.
Remove and Clean Screens
Take out window screens and hose them down outside. Use a soft brush and mild soap if needed. Let them dry completely before reinstalling.
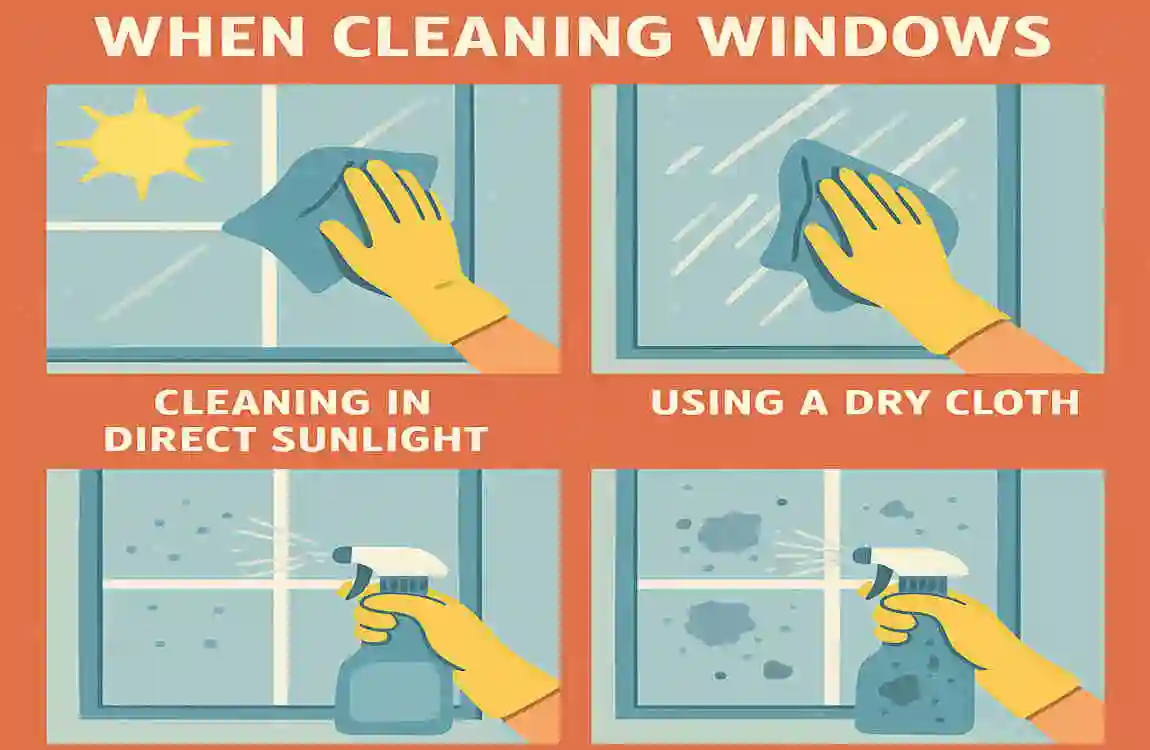
Choose the Right Day
Pick an overcast day for window cleaning. Direct sunlight can cause your cleaning solution to dry too quickly, leaving streaks behind.
Seasonal Timing
- Spring:
- Ideal for deep cleaning after winter grime.
- Fall:
- Prepares windows for the shorter, darker days ahead.
- After storms:
- Remove debris and prevent stains from setting.
Pro Tip:
Lay towels or drop cloths under windows to catch drips and protect floors.
Step-by-Step Cleaning Guide: How to Clean Windows Like a Pro
Ready to get started? Follow these steps for streak-free, professional results every time.
Spray Solution on the Glass (Not the Frames)
Generously mist your chosen cleaning solution onto the glass. Avoid spraying the frames to prevent damage or streaks on painted surfaces.
Scrub in a Zig-Zag or S-Pattern
Use a sponge or scrubber to work the solution into the glass. Move in a zig-zag or S-pattern to cover the entire surface and lift dirt effectively.
Squeegee Top-Down, Overlapping Strokes
Place your squeegee at the top of the window and pull down in a straight line. Overlap each stroke slightly to avoid missed spots. Wipe the squeegee blade with a clean cloth after each pass to prevent streaks.
Buff Edges with a Dry Microfiber Cloth
After squeegeeing, use a dry microfiber cloth to buff the edges and corners where water may collect.
Inside Windows: Circular Wipe, Then Straight Buff
For interior windows, wipe in a circular motion to loosen grime, then finish with straight strokes for a polished look.
High-Reach Windows: Use an Extension Pole
Attach your squeegee or scrubber to an extension pole for tall or hard-to-reach windows. Always prioritise safety—never overreach from a ladder.
Dry and Inspect
Check your work from different angles. Touch up any missed spots with a clean, dry cloth.
Reinstall Screens
Once everything is dry, put the screens back in place.
Clean Up
Dispose of dirty water and wash your tools for next time.
Enjoy the View!
Step back and admire your streak-free, sparkling windows.
Common Errors and How to Fix Them
MistakeFix
Vertical wipes. Use S-zigzag for even coverage
Wet squeegee, dry blade after each pass
Cleaning on a sunny day, wait for cloudy weather
Pro Tip:
Work from top to bottom to prevent drips from dirtying areas that have already been cleaned.
Interior vs. Exterior Window Cleaning Techniques
Cleaning inside and outside windows requires slightly different approaches. Here’s how to tackle each for the best results.
Interior Windows
- Focus:
- Remove fingerprints, smudges, and pet nose prints.
- Solution:
- Use a mild soap or vinegar-water mix.
- Tools:
- Microfiber cloths are usually sufficient.
- Time:
- 5-10 minutes per pane.
Exterior Windows
- Focus:
- Tackle pollen, bird droppings, and environmental grime first.
- Solution:
- Vinegar-based cleaners help dissolve mineral deposits.
- Tools:
- Squeegee is essential for large, outdoor panes.
- Time:
- Pre-rinse with a hose to remove loose dirt.
Height Safety and Ladder Tips
- Always use a sturdy ladder on level ground.
- Never lean out too far—move the ladder instead.
- Consider extension poles for second-story windows.
Pro Tip:
If you’re uncomfortable with heights, hire a professional for exterior cleaning.
Tackling Tough Stains: Hard Water, Paint, and Sap
Some stains need extra attention. Here’s how to handle the most stubborn spots.
Hard Water Stains
- Solution:
- Make a paste with baking soda and water. Apply to the stain, let sit for a few minutes, then scrub gently with a non-scratch pad.
Paint and Construction Residue
- Solution:
- Use a razor scraper held at a 45-degree angle. Gently scrape away paint or debris, being careful not to scratch the glass.
Tree Sap and Bug Marks
- Solution:
- Apply a bit of rubbing alcohol or vinegar to a cloth and rub the spot until it lifts.
Before and After Scenarios
- Before:
- Cloudy, spotted glass with visible marks.
- After:
- Clear, streak-free windows that look brand new.
Pro Tip:
Repeat treatments as needed for stubborn stains, but always test on a small area first.
Pro Maintenance Schedule: Keep Windows Sparkling Year-Round
Consistency is key to maintaining beautiful windows. Here’s a simple schedule to follow:
- Monthly:
- Spot-clean fingerprints and smudges.
- Quarterly:
- Deep clean all windows inside and out.
- After Storms:
- Rinse exterior windows to remove debris and prevent stains.
Benefits Checklist:
- Brighter, more inviting home
- Longer-lasting window glass and frames
- Improved curb appeal
- Less time spent on deep cleaning
Pro Tip:
Consider scheduling professional window cleaning twice a year for the best results.
Eco-Friendly and Budget Tips for Window Cleaning
You don’t need harsh chemicals or expensive products to get great results.
Green Cleaning Tips
- Reuse vinegar:
- It’s practical, safe, and much cheaper than commercial cleaners.
- DIY saves money:
- Homemade solutions cost as little as $0.50 per bottle, compared to $5 or more for store-bought brands.
Myths Busted
- Newspaper for cleaning?
- It can smear ink and leave residue—stick to microfiber cloths for a streak-free shine.
Pro Tip:
Repurpose old t-shirts as cleaning rags for an eco-friendly option.
Common Mistakes to Avoid When Cleaning Windows
Even seasoned DIYers make mistakes. Here are the top five errors—and how to fix them:
- Over-spraying solution:
- Too much liquid pools and causes streaks. Use a light mist.
- Using the wrong clothes:
- Paper towels and old rags leave lint. Always use microfiber.
- Ignoring frames and tracks:
- Dirt here can transfer to clean glass. Wipe them down first.
- Not drying the squeegee blade:
- A wet blade leaves streaks. Wipe after every pass.
- Cleaning in direct sunlight:
- Solutions dry too fast, causing streaks. Wait for a cloudy day.
Reader Poll:
What’s your biggest window cleaning challenge? Share your tips and stories in the comments!